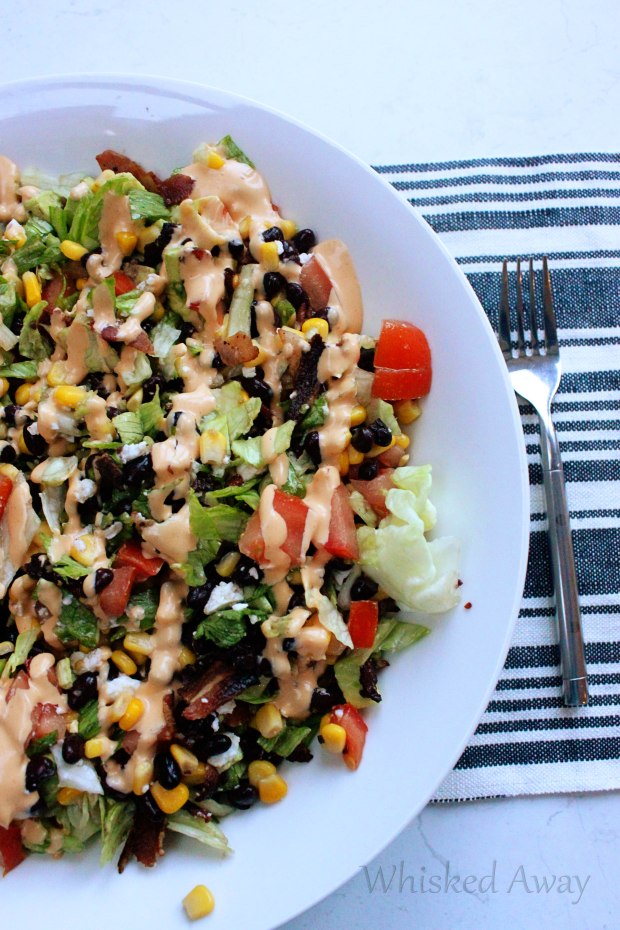
BLT Chopped Salad

BLT Chopped Salad
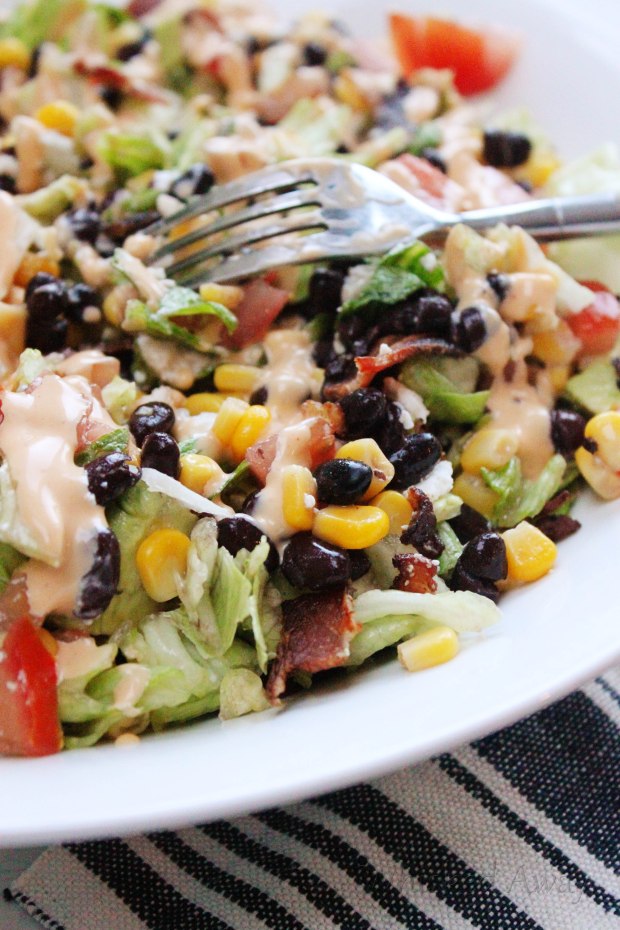
It’s hard to get my husband behind the idea of salad for dinner. I mean, he never complains if I serve it, but it’s just one of those things you pick up on after being married for 15 (oh wait, almost 16!) years. But if it’s hard to get my husband on board, then you can only imagine how hard it is to get my kids on board! But this right here does it. I’m giving the bacon full credit. I mean, who doesn’t love  a good BLT? But  being able to have that same delicious BLT flavor without the added carbs is guilt free eating if I’ve ever seen it. My two oldest couldn’t shovel it in fast enough and in between bites kept saying, “this is so good”, “no, this is really good”. In my book that goes down as a success.

BLT Chopped Salad

2 cups green leaf lettuce, chopped
2 cups fresh arugula, chopped
1 pint grape tomatos, quartered
4 slices thick-cut bacon, fried and crumbled
1 cup sweet corn
1 cup black beans
1 avocado, chopped
4 ounces feta, crumbled
1 1/2 tablespoons olive oil
1 lime, juiced
1/4 teaspoon salt
1/4 teaspoon pepper
ranch dressing

Prepare ingredients. In a large bowl, combine lettuce, arugula, tomatoes, corn, black beans and avocado. Add in salt, pepper, olive oil and lime juice then toss well to coat. Fold in bacon and feta then drizzle with ranch dressing. Serve immediately.

Source | How Sweet It Is

{Flashback Friday} Spinach Pesto Pasta

I absolutely love this recipe, because not only is this dish super good, but with an entire bag of spinach packed into it then it is super good for you too. You know I love Alfredo pasta with the best of them, but it’s nice to find a pasta dish that tastes incredible and you don’t have to feel guilty about eating it. It’s just perfectly light and flavorful for a summer evening, and doesn’t take too long so you’re not slaving over a hot stove.  I’ve always loved pesto pasta, but there’s just something about this dish that takes it a step above the rest!

1/2 cup pine nuts
2 Tbs butter
1 Tbs olive oil
1 shallot, finely chopped
3 cloves garlic, minced
1 bag baby spinach leaves (about 4 cups)
1 bunch fresh basil leaves
1/4 cup olive oil
zest of 1 lemon
1 Tbs lemon juice
3/4 /c freshly grated Parmesan (plus more for serving)
1 package spaghetti pasta (I prefer whole grain or whole wheat)
Salt and pepper to taste
1 pint cherry tomatoes, halved

Toast the pine nuts in a dry skillet over medium heat for a few minutes then remove and set aside. Add the butter and 1 Tbs olive oil to the skillet and cook over low heat until butter is melted. Add the shallots and garlic, continue cooking over low heat stirring for 5-7 minutes or until a golden color. Remove the stems from the spinach. Bring one cup of water to a boil in a large saucepan. Add the spinach, cover and cook for 2 minutes. Drain then squeeze out the excess water. Place the spinach in a food processor or blender along with the cooked shallots and garlic, basil, 1/4 cup olive oil, lemon zest, lemon juice, Parmesan and half the pine nuts. Blend to form a chunky paste.  Cook the pasta according to the package directions until al dente. Remove 3 Tbs cooking water and stir into the spinach mixture. Drain the pasta, return to the pan and add the spinach mixture and remaining pine nuts, mix well to combine. Blanch the tomoatoes for a few minutes in boiling water then remove with a slotted spoon and gently mix into the pasta. Top each serving with Parmesan, basil, a squeeze of lemon and season with salt and pepper to taste.

Source | Everyday Delicious: Chelsea Winter

Original post here

Grilled Flat Bread Pesto Pizza

Grilled Flat Bread Pesto Pizza

My sister had posted a picture of her flat bread pizza lunch on instagram and I immediately added it to the next week’s menu. Such a quick and easy lunch or dinner that can easily be customized to fit any taste. I love the smokey flavor of the charred bread combined with the subtle flavor  of pesto and dripping with melted cheese. The tomatoes and basil freshen it up and the zip of balsamic vinegar just ties it all together. Even though it’s more soup weather than it is grilling weather over here, I just couldn’t resist. Although by the time this scheduled post is up then we’ll be well on our way back to the states where I can’t wait to eat all the seasonal fresh fruit and host BBQ’s with friends and family! Eeeek! I’m giddy with excitement just thinking about it! And I have a feeling there will be plenty more grilled flat bread pizza in our near future!

Grilled Flat Bread Pesto Pizza

Grilled Flat Bread Pesto Pizza

Grilled Flat Bread Pesto Pizza

2 whole wheat naan flatbreads (the flatbread they sell here is more like a tortilla, so I used a panini bread instead)
olive oil (for brushing)
coarse sea salt
1/4 cup pesto (approximately)
1 cup shredded mozzarella
1 tomato, sliced
fresh basil, chopped
balsamic vinegar (to drizzle)
diced grilled chicken (optional)

Brush both sides of bread with olive oil, then lightly sprinkle each side with coarse sea salt. Add the flatbread to the grill and cook over med-low heat for 3-4 minutes. Flip over then remove from grill and spread the cooked side with pesto, sprinkle with cheese, add tomato slices (and diced grilled chicken if using). Return to the grill, close the lid and continue cooking for an additional 3-4 minutes, or until cheese is melted. Transfer to serving plate, garnish with chopped basil and a drizzle of balsamic vinegar.

Source | Six Little Chefs

Grilled Flat Bread Pesto Pizza

Roasted Red Pepper Alfredo Pasta

Roasted Red Pepper Alfredo
After just reading the title of this recipe I knew I had to try it, and it did not disappoint! This rich, creamy, flavorful pasta tastes as good as it sounds. A quick week night meal that tastes like restaurant quality. I’m all over that!

Roasted Red Pepper Alfredo

2 whole red bell peppers (I just used a 12 oz jar of roasted red peppers)
2 tablespoons olive oil
1 small onion, diced
2 cloves garlic, minced
1 cup half & half (or 1/2 cup milk and 1/2 cup cream)
4 oz. garlic & herb goat cheese
2/3 cup grated parmesan cheese
1/2 cup artichoke hearts (optional)
1/2 lb. linguine, cooked to al dente
salt & pepper, to taste
basil (to garnish)

If you are roasting your own peppers, preheat oven to 500 degrees. Place red peppers on baking sheet and bake 20-30 minutes until peppers are charred. Remove from oven and cover with foil 10 minutes. Meanwhile, saute onions and garlic in olive oil 5-7 minutes or until tender. Pour in half & half, goat cheese (or crumbled feta), parmesan, salt and pepper. Stir until cheeses are melted then keep warm over low heat. Uncover peppers, peel off skin, remove stem and seeds. Chop into large pieces and stir into the sauce. Remove from heat and pour sauce into food processor and puree, or use an immersion blender. Return back to the pan and toss with cooked pasta. Garnish each serving with grated parmesan and chopped fresh basil.

Source | Lauren’s Latest

{20 minute} Garlic Alfredo Tortellini

Garlic Alfredo Tortellini
Meals don’t get much easier or tastier than this! A rich creamy alfredo sauce (yet lightened up by substituting heavy cream for milk and half & half) poured over cheese tortellini–yes please! A hundered times over. Any day of the week.

Garlic Alfredo Tortellini

1 (9-ounce) package refrigerated three cheese tortellini
2 tablespoons unsalted butter
3 cloves garlic, minced
1/4 teaspoon crushed red pepper flakes
2 tablespoons all-purpose flour
1 cup milk, or more, as needed
1/2 cup half and half
2 ounces cream cheese, cubed
1/4 cup freshly grated Parmesan cheese
Kosher salt and freshly ground black pepper, to taste
2 tablespoons chopped fresh parsley leaves

In a large pot of boiling salted water, cook tortellini according to package directions then drain well. Melt butter in a saucepan over medium heat. Add garlic and red pepper flakes, and cook, stirring frequently, until fragrant, about 1 minute. Whisk in flour until lightly browned, about 1 minute. Gradually whisk in milk and half and half, and cook, whisking constantly, until slightly thickened, about 2-3 minutes. Stir in cheeses until melted, about 1-2 minutes. Season with salt and pepper, to taste. Stir in tortellini and gently toss to combine.
Serve immediately, garnished with chopped parsley, if desired.

Source | Damn Delicious

White Lightning Chicken Lime Chilli

White Lightning Chicken Lime Chilli

My friend brought over this soup right after I had one of my babies. It was absolutely delicious. And it wasn’t just because I was breastfeeding and wanted to eat everything in sight, or because I was so sleep deprived that my brain couldn’t function. No, I have made it several times since then and it is just as delicious as the first! This soup has since become one of my favorites with it’s rich creamy texture and hint of lime, topped with a handful of crushed tortilla chips. Perfection.

White Lightning Chicken Lime Chilli
2 boneless, skinless chicken breasts, cooked and shredded
1/2 onion, chopped
1 Tbs olive oil
1 teaspoon salt
1 teaspoon ground cumin
1 teaspoon dried oregano
1/2 teaspoon pepper
1/4 teaspoon cayenne pepper
2 cloves garlic, minced
1 can (4 ounces) chopped green chilies
2 cups chicken broth
1 1/2 tablespoon lime juice
¼ cup chopped cilantro
2 cans (15 1/2 ounces each) Great Northern Beans, rinsed and drained
1 can white shoepeg corn
1 cup sour cream
1/2 cup heavy cream

Toppings: tortilla chips, lime wedges, cilantro, shredded cheese, sour cream.

Cook and shred chicken, then set aside. In a pot over medium high heat, saute onion, salt, cumin, oregano, pepper and cayenne pepper for 5-6 min. Add garlic and green chilies then saute another minute or two. Add chicken broth, lime juice, cilantro, beans,  corn and shredded chicken. Reduce heat, cover and simmer for 15-20 minutes. Stir in cream and sour cream then cook until warmed through.  Garnish each serving with desired toppings.

Source | Chelsea Figgins

Skillet Balsamic Chicken & Vegetables

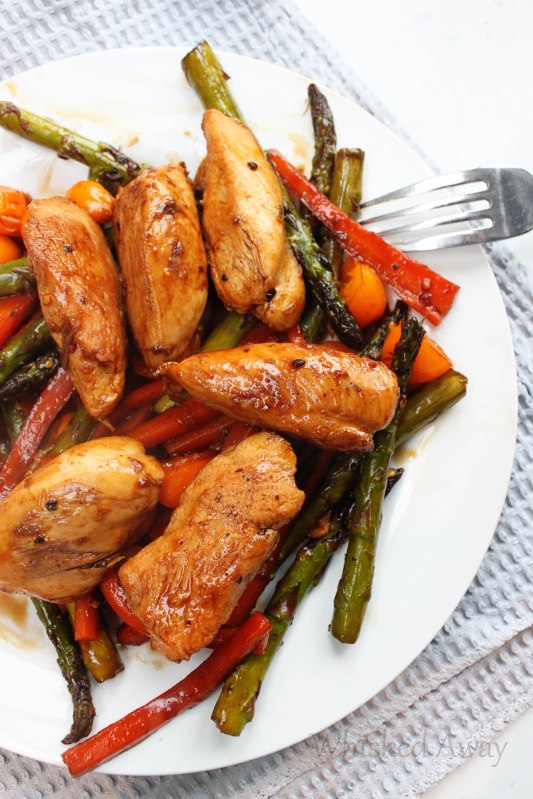
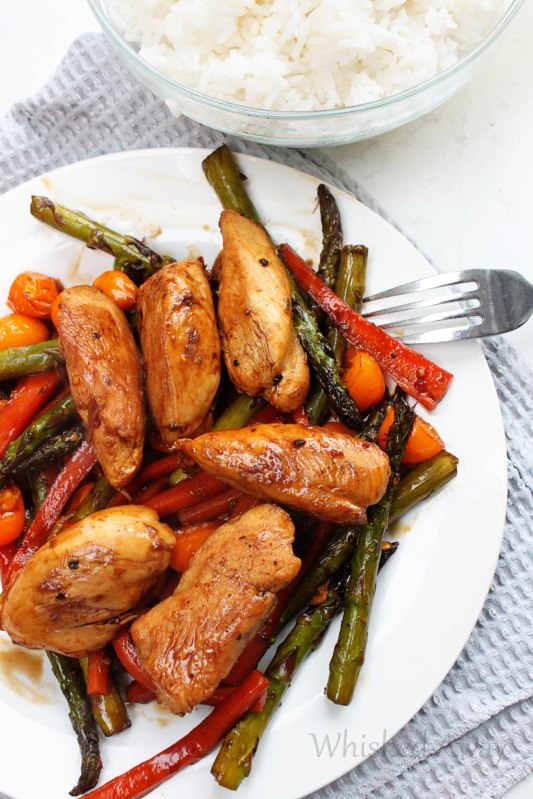
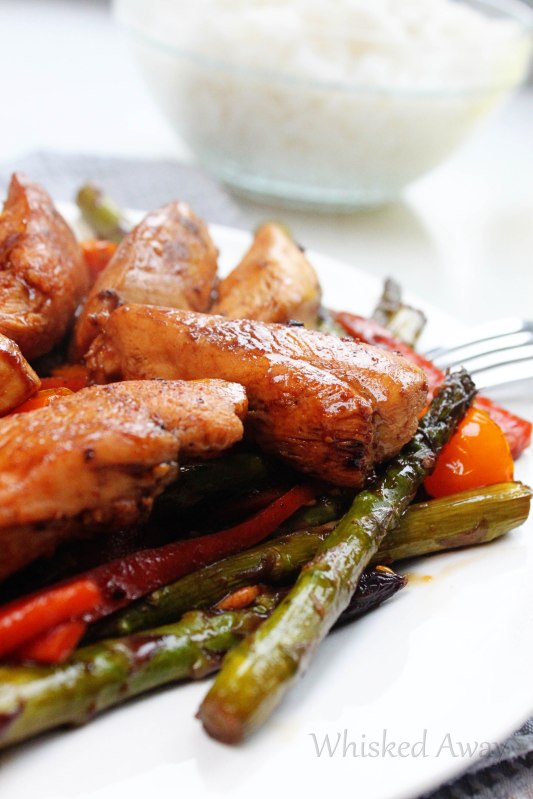
My idea of the perfect meal is: First and foremost, delicous. Healthy. Simple and quick to throw together. Looks pretty. Doesn’t require a lot of clean up.  There, I think I covered all the bases. And this dish right here ticks every single one of those boxes. 1) The sauce is just straight up phenomenal, just so full of flavor. 2) Chock full of fresh veggies and lean chicken. 3) On the table in less than 30 minutes. 4) Only one skillet to clean. 5) The presentation and bright colors are just a work of art. So there you have it, dinner doesn’t get much better than this.

One Skillet Balsamic Chicken & Vegetables
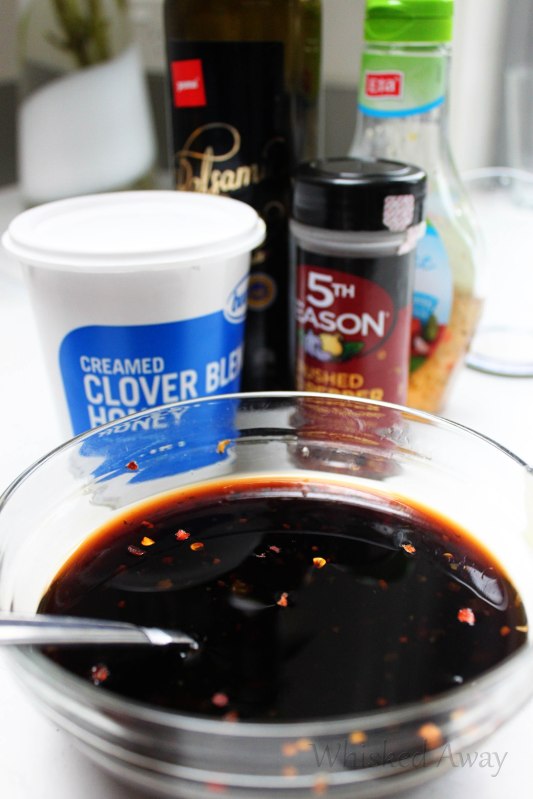
In a mixing bowl whisk together salad dressing, balsamic vinegar, honey and red pepper flakes, set aside. (as a side note, I had my husband bring back year supply of crushed red pepper flakes and other seasonings I can’t seem to find here. So glad he did so that I can make fabulous dishes like this!)

One Skillet Balsamic Chicken & Vegetables
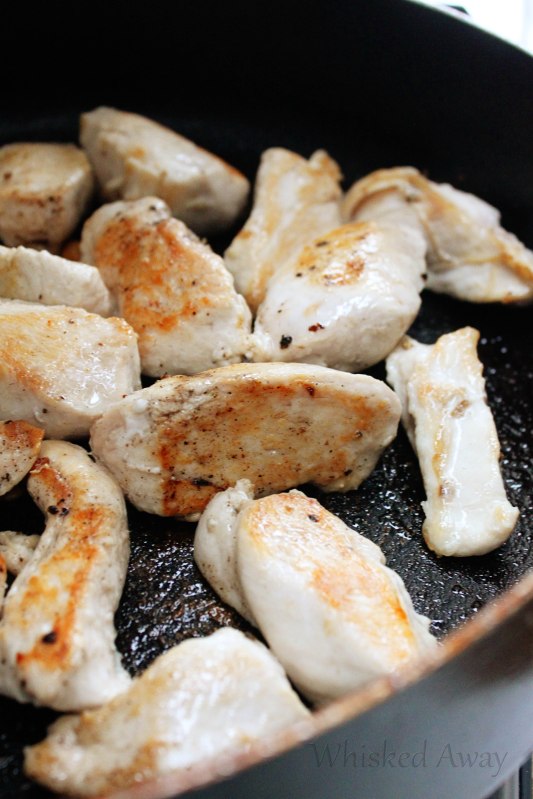
Heat olive oil in a large skillet over medium-high heat. Season chicken with salt and pepper to taste, then add to skillet and cook about 4-5 minutes per side, or until chicken has cooked through.

One Skillet Balsamic Chicken & Vegetables
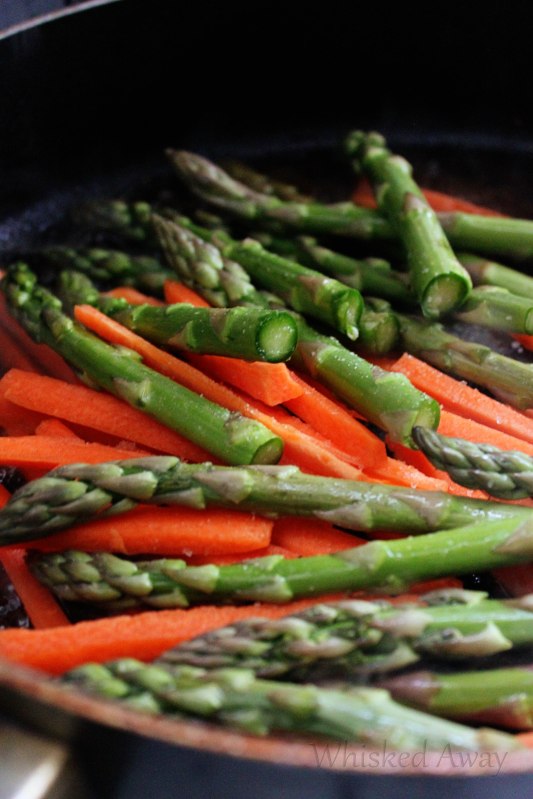
Meanwhile, trim asparagus of tough ends, and prepare carrots, zuchhini and tomatoes. Add half the dressing mixture to skillet and rotate chicken to evenly coat. Remove chicken from skillet and set aside. Add asparagus, carrots and zucchini to skillet, season with salt and pepper to taste and cook (stirring regularly) until crisp tender, about 4 minutes.

One Skillet Balsamic Chicken & Vegetables
Return chicken to the skillet with the veggies. Pour remaining dressing over meat and veggies. Stir gently to coat and cook for another minute. Remove from heat and serve warm. Can also serve over rice.

One Skillet Balsamic Chicken & Vegetables

One Skillet Balsamic Chicken & Vegetables
2/3 cup light Italian salad dressing
4 Tbsp balsamic vinegar
3 Tbsp honey
1/4 tsp crushed red pepper flakes
3 chicken breasts, cut into strips
4 Tbsp olive oil
Salt and freshly ground black pepper
1 lb fresh asparagus and/or green beans
1 1/2 cups carrots, peeled and julienned
1 1/2 cups zucchini, julienned
1 cup grape tomatoes, cut in half

In a mixing bowl whisk together salad dressing, balsamic vinegar, honey and red pepper flakes, set aside. Heat olive oil in a large skillet over medium-high heat. Season chicken with salt and pepper to taste, then add to skillet and cook about 4-5 minutes per side, or until chicken has cooked through. Meanwhile, trim asparagus of tough ends, and prepare carrots, zuchhini and tomatoes. Add half the dressing mixture to skillet and rotate chicken to evenly coat. Remove chicken from skillet and set aside. Add asparagus, carrots and zucchini to skillet, season with salt and pepper to taste and cook (stirring regularly) until crisp tender, about 4 minutes. Return chicken to the skillet with the veggies. Pour remaining dressing over meat and veggies. Stir gently to coat and cook for another minute. Remove from heat and serve warm. Can also serve over rice.

Source | Six Little Chefs

BBQ Burger Sliders

Where do I start….I feel like I rave about every single recipe so I feel like a broken record. I know I tell you every time how much you NEED each recipe in your life. So this time I’ll leave it to the testimony of others. First of all we’re talking hamburgers. I mean, it’s nothing earth shattering, but there is just something about these that left my husband speechless. I got the recipe for the patties from a fellow Kiwi cook who made a steep claim that her husband’s hamburger patties were the best in the world. So I gave them a try, and after each bite my husband was like oh.my.gosh.this.is.the.best.hamburger.I’ve.ever.eaten. So grandma Judy’s partner, Pete (FYI “partner” is referring to your significant other, I know it has a different connotation in the States) was over next door so I brought a few over to share with them. Because that’s just what we do. Not even 5 minutes later he came over just raving about them. He ate them both, he didn’t even share with Judy. He told me he’s a big hamburger guy, but these were THE best hamburgers he’s ever had. And then Jason asked me to make them again when we had the missionaries over a few days later. And between the two of them they ate 9 burgers. And then I’ve been requested to make them again this weekend when we visit Pete’s farm.  So I’ll just leave you with that introduction, but I’d say that’s a pretty strong recommendation.

The best BBQ Burger Sliders ever!
Crack 2 eggs into a bowl and whisk together. Mix in the breadcrumbs, mixed herbs, garlic, beef bouillon and BBQ sauce, mix until combined.

The best BBQ Burger Sliders ever!
Add the ground beef and use your hands to mix it all together. Split the mixture into 6-8 balls and flatten into patties.

The best BBQ Burger Sliders ever!
Coat them lightly in flour, gently pat to remove the excess flour.

The best BBQ Burger Sliders ever!
Grill over medium heat for 7-8 minutes per side, or until cooked through (don’t over cook or they will become dry). During the last minute of cooking, lay cheese slices on top and cook until beginning to melt (I totally forgot to add the cheese, so after this picture I put them back on the grill :).

The best BBQ Burger Sliders ever!
Split the rolls in half then broil for a minute or two until lightly toasted. Mix the ketchup and mayo together then spread on both sides of the roll. Place burger (with melted cheese slice) on bottom roll, then layer with tomatoes, pickles, red onion and salad greens, then cover with the top roll and enjoy!

The best BBQ Burger Sliders ever!

BBQ Burger Slider
For the patties:
1 lb ground beef
2 eggs
1/2 cup breadcrumbs
1 tsp mixed herbs (or 1/2 tsp parsley and 1/2 tsp basil)
1 1/2 tsp minced garlic
1 tsp beef bouillon
2 TBSP BBQ sauce

Crack 2 eggs into a bowl and whisk together. Mix in the breadcrumbs, mixed herbs, garlic, beef bouillon and BBQ sauce, mix until combined. Add the ground beef and use your hands to mix it all together. Split the mixture into 6-8 balls and flatten into patties. Coat them lightly in flour, gently pat to remove the excess flour. Grill over medium heat for 7-8 minutes per side, or until cooked through (don’t over cook or they will become dry). During the last minute of cooking, lay cheese slices on top and cook until beginning to melt.

For the burgers:
6-8 crusty dinner rolls
6-8 cheese slices (I used colby)
1/2 cup ketchup
1/4 cup mayo
sliced pickles
sliced tomatoes
sliced red onions
spring mix salad greens

Split the rolls in half then broil for a minute or two until lightly toasted. Mix the ketchup and mayo together then spread on both sides of the roll. Place burger (with melted cheese slice) on bottom roll, then layer with tomatoes, pickles, red onion and salad greens, then cover with the top roll and enjoy!

Source | Kiwi Country Girl

Also shared at:
Tell ’em Tuesday
Fiesta Friday
What’d You Do This Weekend

{mother’s day brunch} Feta, Tomato and Spinach Omelet

Mother’s Day is around the corner and I’m missing my mama. It’s been 11 years since we’ve even lived in the same state together, but being on the other side of the world is even harder. I wish I lived close enough to invite her over for a Mother’s Day brunch. And if I could, this is what I would make. These incredible omelets, with some muffins and fresh fruit on the side. This savory omelet is filled with fresh and flavorful ingredients (feta, tomato, spinach and avocado are the perfect combination, if you ask me) to create a delicious and beautiful dish fit for your queen. Hopefully one of these days I’ll get the chance to make this for her, but until then I may be requesting my husband to make this for my own Mother’s Day brunch ;).  Omelets always seemed so intimidating, but the good news is that they aren’t. Speed is the key when it comes to making them, which also means that a delicious breakfast will be on the plate in under 5 minutes, you can’t beat that. It has taken me a few trial and errors to get it right, and I still occasional turn a failed omelet into scrambled eggs, but once you get the hang of it, it really is quite simple. And the results are divine.

Feta, Tomato and Spinach Omelet + step by step instructions for making the perfect French Omelet

Heat skillet over medium heat, add 1 Tbs butter and swirl to evenly coat skillet

Feta, Tomato and Spinach Omelet + step by step instructions for making the perfect French Omelet

Crack two eggs into the pan, then working quickly add half and half and whisk together. Don’t over beat, you don’t want to have scrambled eggs,  mix until just combined

Feta, Tomato and Spinach Omelet + step by step instructions for making the perfect French Omelet

lift and tilt skillet until eggs are spread into a thin layer (like you would when making crepes)

IMG_9201

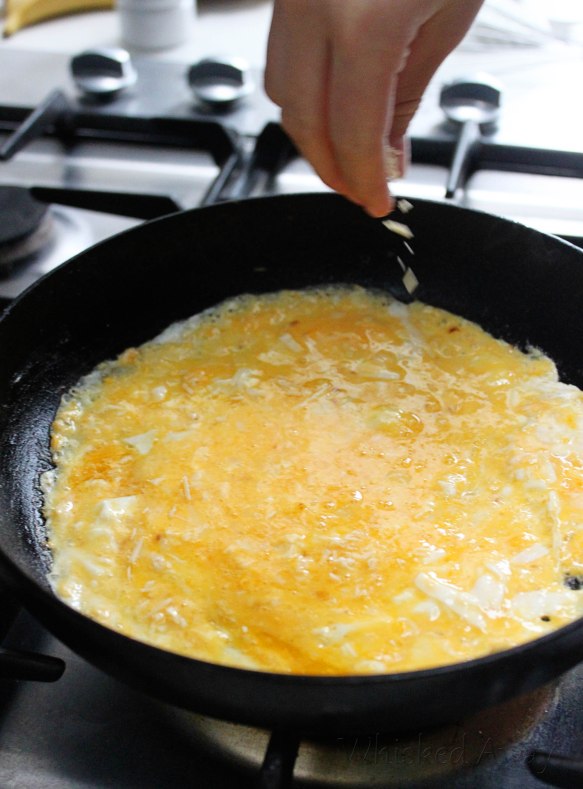
Sprinkle with parmesan cheese, and dash of salt and pepper
Feta, Tomato and Spinach Omelet + step by step instructions for making the perfect French Omelet

Feta, Tomato and Spinach Omelet + step by step instructions for making the perfect French Omelet

Lift edges to loosen and once the underside is lightly browned (don’t over cook, although I tend to like mine that way), gently flip.

IMG_9193

This is where I’m taking some creative control. A real french omelet is only cooked on one side then removed while the center is still creamy. I prefer my eggs to be cooked a little longer, so I flip it over and let it cook while I add the filling, but if you prefer it the other way, just remove it to the plate before adding the filling. Cover one half with tomato, avocado, feta and spinach

Feta, Tomato and Spinach Omelet

fold in half and transfer to a plate for serving

Feta, Tomato and Spinach Omelet + step by step instructions for making the perfect French Omelet

Feta, Tomato and Spinach Omelet + step by step instructions for making the perfect French Omelet

*makes one omelet

2 Eggs
1 Tbs butter
1 Tbs Half and half
1 Tbs shredded Parmesan cheese
Salt and pepper, to taste

Filling: diced tomato, diced avocado, crumbled feta cheese, chopped baby spinach leaves

Heat skillet over medium heat, add 1 Tbs butter and swirl to evenly coat skillet. Crack two eggs into the pan, then working quickly add half and half and whisk together. Don’t over beat, you don’t want to have scrambled eggs, mix just until combined then lift and tilt skillet until eggs are spread into a thin layer (like you would when making crepes). Sprinkle with parmesan cheese, and dash of salt and pepper. Lift edges to loosen and once the underside is lightly browned (don’t overcook), gently flip. (This is where I’m taking some creative control. A real french omelet is only cooked on one side then removed while the center is still creamy. I prefer my eggs to be cooked a little longer, so I flip it over and let it cook while I add the filling, but if you prefer it the other way, just remove it to the plate before adding the filling). Add filling ingredients to one half of the omelet then fold in half and transfer to a plate for serving.

Source | Cooking Light

Also shared at:
Fiesta Friday link up party
What’d you do this weekend
Tell ’em Tuesday
Smothered Rotisserie Chicken Flautas

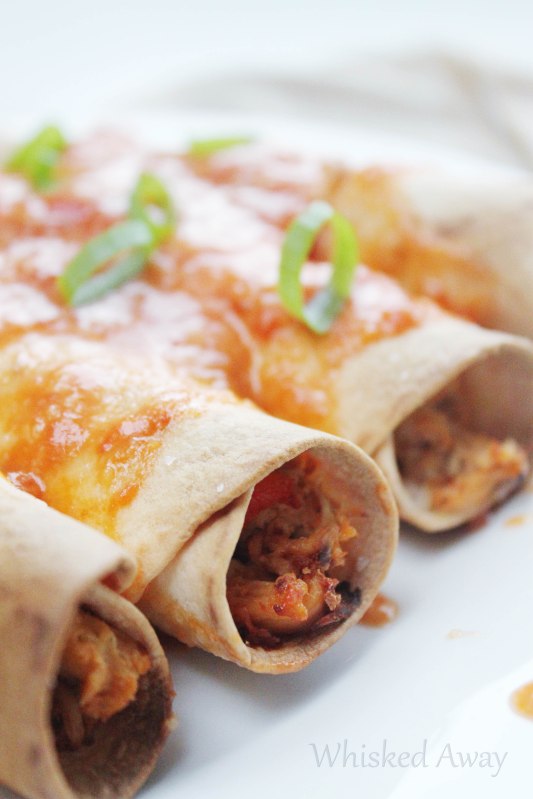
With Cinco de Mayo right around the corner, I’m throwing another Mexican dish your way! and if you’re planning a party, may I introduce you to one of my favorites. It’s pretty clear that I love Mexican food in all forms, but I especially love flautas and taquitos because they are the perfect size for party food, or for portion control. I mean, I love Chipotle as much as the next gal, but their burritos weigh as much as my first born child. These bite sized crispy burritos are just perfect. But don’t let their size fool you, they are packed with so much flavor that they will leave your mouth watering for more! The tender rotisserie chicken sauteed with vegetables and a mix of spices, then baked to crispy perfection and drizzled with a creamy cheese sauce for the ultimate in flavor experience. I have a feeling you and all your guests are going to love these! And even if there is no Cinco de Mayo party, you will still love these. They don’t discriminate.

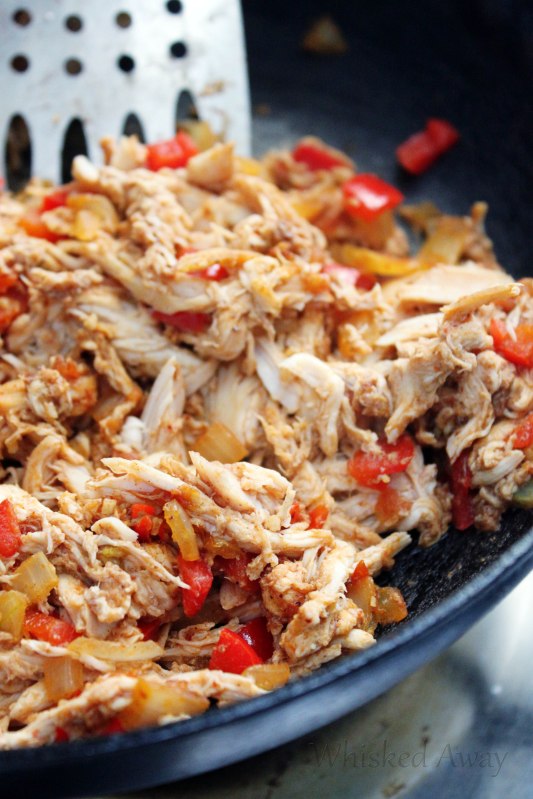
Smothered Rotisserie Chicken Flautas
Preheat oven to 375 degrees. Heat olive oil in a skillet over medium heat. Add onion, pepper and tomato. Season with salt and pepper. Saute until veggies start to soften, about 2-3 minutes. Add cumin, chili powder, garlic, salt, chicken and water. Mix together and cook until heated through and liquid is absorbed, about five minutes.

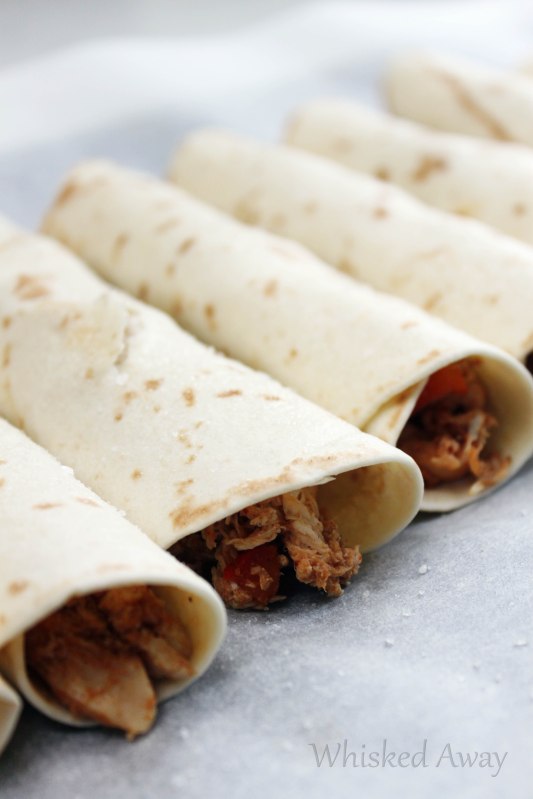
Smothered Rotisserie Chicken Flautas
Place about ¼ cup of the filling down the center of the tortillas. Wrap tight and place seam side down on a baking sheet lined with parchment paper. Spray generously with olive oil cooking spray then sprinkle with coarse salt.

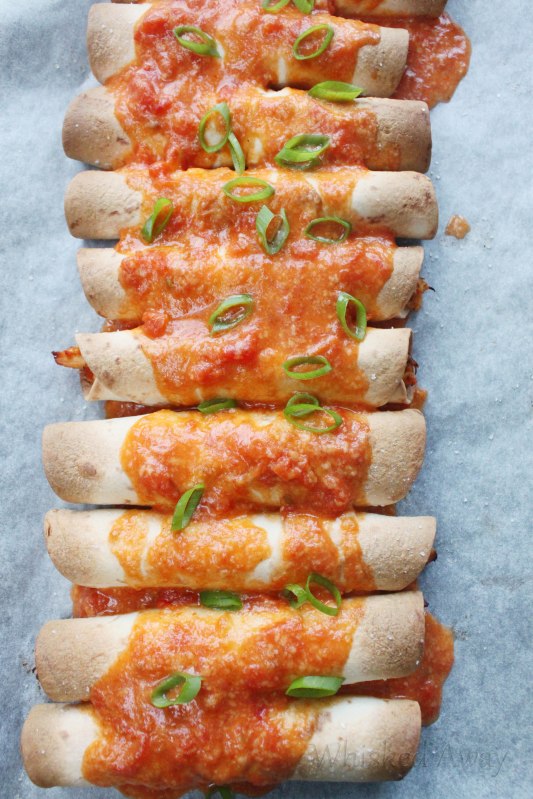
Smothered Rotisserie Chicken Flautas
Bake until golden brown and crispy, about 20 minutes. To make the sauce, heat Rotel tomatoes in a small saucepan over medium-high heat until just starting to bubble. Toss the cheese in cornstarch then slowly add to the saucepan and stir until cheese is melted (about 5-7 minutes) then whisk in cream and continue stirring for another minute or two. Smother baked flautas with sauce and garnish with green onions and/or cilantro if desired.

Smothered Rotisserie Chicken Flautas

1 teaspoon olive oil
½ medium onion, diced
½ cup diced red pepper
1 small tomato, diced
1 teaspoon cumin
1 teaspon chili powder
1 garlic clove, minced
¼ teaspoons salt
1/4 cup water
1 rotisserie chicken, shredded (about 4 cups shredded chicken)
Olive oil cooking spray
12 (6 inch) tortillas

For the sauce:
1 cup Rotel tomatoes
1 cup shredded cheddar cheese
½ teaspoon cornstarch
2 tablespoons cream

Preheat oven to 375 degrees. Heat olive oil in a skillet over medium heat. Add onion, pepper and tomato. Season with salt and pepper. Saute until veggies start to soften, about 2-3 minutes. Add cumin, chili powder, garlic, salt, chicken and water. Mix together and cook until heated through and liquid is absorbed, about five minutes. Place about ¼ cup of the filling down the center of the tortillas. Wrap tight and place seam side down on a baking sheet lined with parchment paper. Spray generously with olive oil cooking spray then sprinkle with coarse salt. Bake until golden brown and crispy, about 20 minutes. To make the sauce, heat Rotel tomatoes in a small saucepan over medium-high heat until just starting to bubble. Toss the cheese in cornstarch then slowly add to the saucepan and stir until cheese is melted (about 5-7 minutes) then whisk in cream and continue stirring for another minute or two. Smother baked flautas with sauce and garnish with sliced green onions and/or chopped cilantro if desired.

Source | Oh Sweet Basil

Also shared at:

What'd You Do This Weekend
Link up your recipe of the week

tell 'em tuesday